Are you feeling overwhelmed by the mountain of options available to you on your dog training search? You’re not alone! One of the most common dog training options is private lessons. So let’s break down this program so that you can decide for yourself if private lessons are the right for your family.
What are Private Lessons?
Private lessons are one-on-one training sessions with you, your trainer, and your dog. This training option offers you a lot of flexibility in your schedule and what you choose to work on, which is why it’s such a popular program for so many dog trainers and dog owners alike. Whether your dog is easily distracted in group settings, or you personally want more individualized instruction from your trainer, private lessons can offer some great options that other training programs can’t compete with.
Benefits of Private Lessons
Individualized Training
Because private lessons are just that, private, you can really tailor them to your individual needs and goals. Whether you want to work on jumping, barking, leash walking, or any other number of skills, your trainer can and should be able to design a training program specifically for you and your dog. This also means that you have your trainer’s undivided attention for your entire lesson to ask all of your burning questions and get hands-on practice with your dog.
No Distractions… Until You’re Ready
Private lessons are usually held in a training room at your trainer’s facility, in your home, or in quiet space where you and your dog can really focus together. This is a great environment for dogs that are easily distracted or dogs that are working on reactivity. When you and your trainer decide you’re ready, you can start slowly adding distractions in this controlled setting, helping your dog learn how to stay focused and successful.
Schedule
Let’s face it: life is busy! Between work, school, kids’ soccer schedules, there is a lot to juggle. Opting for private lessons gives you the flexibility to schedule time with your trainer when it works for you. And that can be a huge benefit when you have a lot on your plate.
Get the Family Involved!
Most dog trainers will allow (and hopefully encourage) the entire family to join in on private lessons. This is a big benefit that you won’t likely get from group classes, which typically have a limit to allowing only one or two people per dog. With the whole family at your lessons, you can make sure everyone hears the same message, gets to ask all of their questions directly to the trainer, and has the opportunity to practice your new skills. And the more consistent your entire family is at communicating with your dog, the more success you’ll see.
Downside of Private Lessons
No Opportunity for Group Socialization
While it is really nice to work on your dog’s unique needs, many people wish there were an opportunity to socialize with other dogs. That simply isn’t an option with private lessons. Your focus with this program will be working on more dog-specific goals and building up your own relationship with your dog. If you want to get your dog some puppy playmates, you can ask about daycare or joining a group class that focuses on those skills.
Cost
Because you’re paying for your trainer’s undivided attention, private lessons are going to cost more than if you were to join a group class (but less than a board and train). Your trainer’s rates can vary based on where you’re located, what behaviors you need to work on, your trainer’s level of expertise, and how many private lessons you are purchasing. A rough estimate for private lessons can start at about $50 per hour, and then increase from there based on the above factors.
Conclusion
Are private lessons right for you? Only you can truly answer that. But they are worth considering if you need a flexible schedule, want to work one-on-one with your trainer and your dog, and can afford a bit of a price increase. You can make huge strides with your dog’s behavior when you are focused and engaged, and have the help of a great trainer to guide you.
Interested in learning more about our private lesson program? Check out our Training Programs page for a breakdown of what to expect when working with our trainers.
Do you want to be one of those incredibly confident dog owners that can stroll down the street without your dog barking, lunging, pulling, and causing a scene? You can! And you don’t have to hire a dog trainer to get started. You may want to, but you don’t HAVE to. And we’re going to show you how with this simple drill that we lovingly call “Driveway Drills”.
Understanding Why Your Dog Pulls on Leash
Alright, so before you get started, let’s break down what is happening on leash. Currently, you’re struggling to walk your dog. It could be because she wants to sniff every wonderful smell, or because she is reactive and loses her mind when she sees another dog, or perhaps she’s afraid of her own shadow and would rather stay inside. I hate to say it, but the reason your walk isn’t working doesn’t really matter. Not yet, at least. We’ll definitely need to work through those specific behaviors down the road, but first we need to reset your dog’s relationship with the leash.
So right now, when you walk outside with your pup, she sees the leash (and therefore you) as an annoyance. You are keeping her from doing what she currently wants to do (sniff, run, play, bark at the neighbor, etc.). And that causes a lot of frustration for her. So to deal with that frustration, she is choosing to pull harder on that leash to show you exactly where she wants to go. And she’s going to keep pulling until she gets what she wants (or until you force her toward a different path). It’s an incredibly unhealthy relationship that she has with the leash, and by extension, you.
That needs to change. ASAP. It’s not fun for anyone to have their arm pulled for an entire walk. So we’re going to help you reset that relationship. We want to show your dog that every time she feels pressure on the leash, it means she’s gone too far, and she needs to return back to your side. And we want to show you that you are exactly the right person to help her through this. Sound hard? It’s not, as long as you’re ready to be patient and consistent.
Getting in the Right Mindset Before You Begin
Before you start training your dog to walk on leash (and any skill, really), it’s important that you are in the right mindset. Most dog owners see a leash and are instantly reminded of the terrible, stressful, overwhelming walks that they’re used to. You have a negative association with the leash, and you probably don’t enjoy walks very much right now.
We want to ask you to set aside those feelings, as hard as it may be. In order to properly lead your dog into this new way of walking on leash, you need to be a calm and confident leader. You may not feel it right now, but you can probably fake it pretty well if you have to. At least at first. So before you even grab that leash, take a deep breath, tell yourself you are in control of this situation, and that you have the ability to change your walks.
This confidence and sense of calm WILL rub off on your dog. Energy runs through your leash, whether you realize it or not. If you are anxious, holding that leash tightly, on edge at every turn, your dog is going to feel that nervous energy. And she’s going to think that there is a reason to be concerned. “Mom’s worried. Something must not be right. I need to be ready for whatever comes our way!” And BAM, you have a nervous dog that is ready to react to anything in her path.
But if you’re calm, holding the leash loosely by your side with your shoulders relaxed, you are telling your pup that you have control of this situation. She’ll then start thinking, “Huh, mom is super chill right now. She doesn’t seem worried about anything. I’m going to trust that she has control here.” Just like that, you’ve passed your calm energy on to your dog and told her that this walk is going to be different. And that’s before we even start walking!
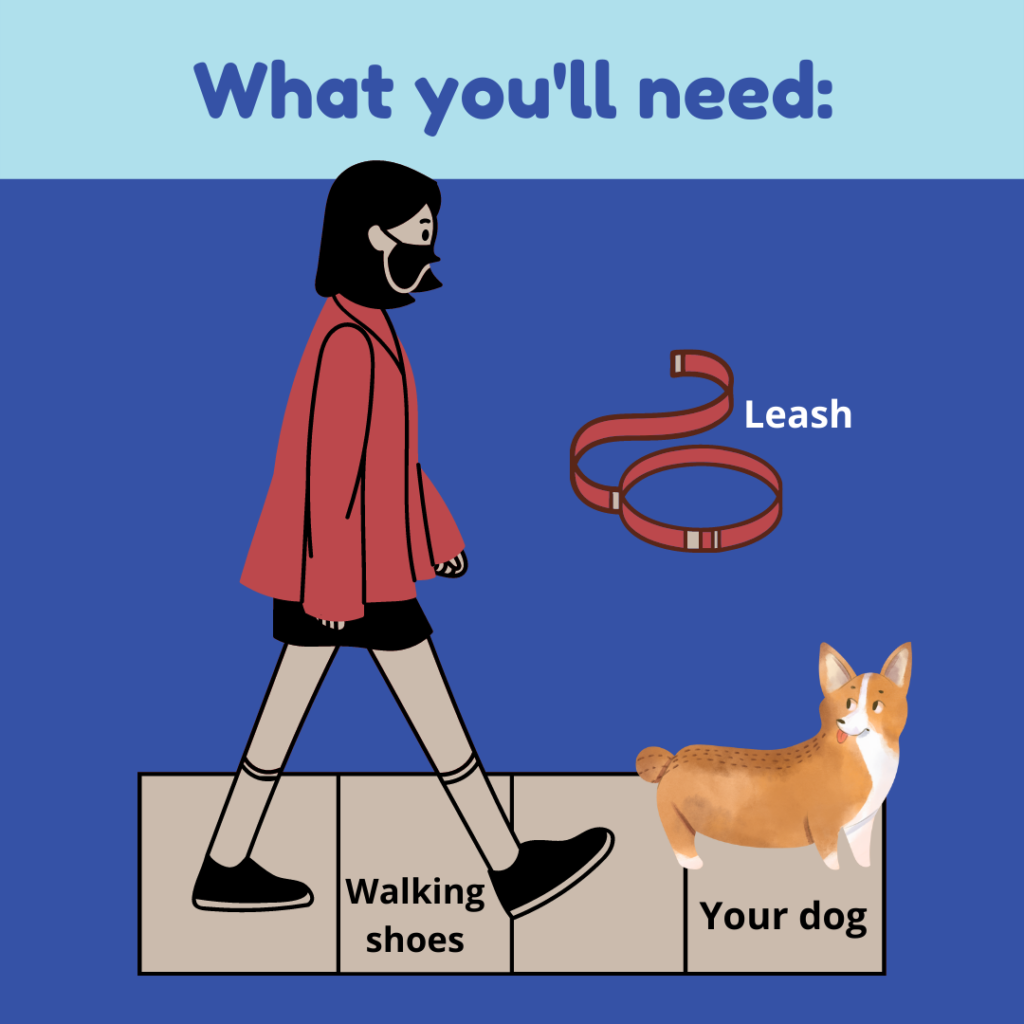
What You’ll Need
Leash
Walking shoes
Driveway (or quiet space with minimal distractions)
Your dog!
Driveway Drills: What Are They?
Driveway drills are your key to a new, happy walk with your pup. It may be easier for us to show you before we explain it, so take a look at this short clip of us working with one of our training dogs, Annie:
Looks easy, right? Maybe even a little boring? But we promise you, there is magic in this drill. And it works with about 99% of dogs that we train, which is why we want you to give it a shot.
So have your dog on leash and find a nice, quiet spot where you won’t be bothered by a lot of distractions. We like the driveway (hence the very creative name for this drill). Now start moving forward. As soon as your dog starts moving past you, change your direction and walk the other way. Your dog will likely hit the end of the leash, realize that you’re walking away, and trot to catch up to you… and then likely run past you again. As soon as she runs past, turn and walk the other way again.
Repeat this until your dog starts to understand that you aren’t going to let her run past you. But you’re also not going to fight her on it. You’re simply going to change direction again and again and again. You should notice that she starts to slow down, give you some eye contact, and may even start to turn with you before hitting the end of the leash. This is when you know you’re ready for the next step: unpredictable movements.
Now you’re going to change your direction and your speed. Make it unpredictable. Go left, then right, then make a figure eight, then jog before coming to an abrupt stop. Have fun with this! The goal here is to keep your dog guessing, and therefore engaged with you. Don’t forget to give her a reward for turning really nicely with you (could be a treat, a “good girl,” or a chance to go play).
Some things to remember as you get started:
Keep your body relaxed with your arm loose at your side;
Once your dog is turning nicely with you, make your movements unpredictable to keep her engaged;
Walk slow enough that your dog has a chance to figure out what you’re doing (you’re not going at your normal speed walking pace here);
Stop this activity as soon as you feel yourself or your dog getting frustrated or overwhelmed. You can always come back to it later when you’re feeling excited about it.
Do I Have to Stay in My Driveway?
Let’s take baby steps to reach your end goal. At first, we definitely recommend staying close to home and doing your driveway drills around minimal distractions. The easier we can make this on you and your dog to begin with, the better. So get really good at doing this in a familiar setting before tackling bigger challenges.
Once your dog is focused and moves with you and is offering eye contact and doing all of those wonderful things you’ve always dreamed of… then you can start to broaden your horizons. Try going to a park and practicing your driveway drills there around new sights and smells. Then go to a parking lot outside of a store and help your dog stay focused with people and cars coming and going. You might feel a little silly, but who cares! You probably also feel self-conscious when your dog is barking up a storm.
This part of training is all about testing and seeing what your dog needs help with, all while making sure you’re doing everything you can to keep her successful. So don’t rush and try to do this in the middle of a pet store after one session. Trust us, you’ll both be frustrated and will not feel good about the situation. So find situations that you know she might struggle with, and practice keeping her attention on you while you move around.
How Often Should We Practice?
Driveway drills look and sound simple in theory, but they do take time and practice. So plan on giving yourself some time to build up your confidence and skills together. Remember, you’re resetting your relationship on leash. And unless you just brought home an 8-week old puppy, you likely have months or years of thinking to undo for your dog about what walks should look like.
Our recommendation: short and often is always best. Ideally, you should aim to spend about five minutes doing driveway drills together. A lot of learning can happen in just five minutes. And by keeping it short, you’re ensuring that neither you nor your dog get burnt out. That’s going to leave you both wanting to come back for more.
You can practice as many times a day as you’d like. And if you live with multiple people, each person should take a turn working on this with your dog. This will ensure that your dog understands the expectations with every person in the home, and not just the person that puts in the practice.
Conclusion
Does this sound like a lot of work? Probably. But the benefits and the outcome are worth every second. Depending on how much practice you put in, you absolutely should start to see big changes within a few weeks (and sooner if you practice every day). Taking the time now to show your dog exactly how you want her to walk on leash will lead to a lifetime of relaxing and fun walks together. You won’t have to fight over who has to hold the dog’s leash, or debate if you should just leave her at home.
If you’re willing to commit your time and energy (in only 5 minute bursts!), you will absolutely see big changes in how your dog walks on leash. We’ve seen it over and over again.
I have yet to have a client approach me and say “Allison, my dog’s leash skills are too perfect. Why isn’t she pulling and barking like all the other dogs?” It just doesn’t happen.
What we typically hear is “My dog pulled me to the ground chasing the neighbor’s cat yesterday,” or “I have to walk my dog at 5am before anyone else is awake, otherwise she loses her mind,” or “I stopped trying to walk my dog because it’s just not worth the stress.”
Walks should be fun for both you and your dog. In an ideal world. But walking calmly on leash is not your dog’s natural instinct, so you need to teach her. And perhaps you’re currently telling yourself “I CAN’T walk my dog,” or “I don’t know how to walk my dog.” Those are normal thoughts when you’re frustrated, but we want to help you shift those thoughts into something more positive. Because we know you can do it.
As you get started on your dog walking journey, we have one easy trick that you can start implementing to see where her attention is, what she is focusing on, and how you can help her pay more attention to you. Sound too good to be true? It’s not!
Step 1: Driveway Drills
Driveway drills! If you are just learning how to walk your dog, I want you to check out this video we created on driveway drills. This skill teaches your dog how to start moving with you rather than pulling against the leash. So take the next 59 seconds to see this lifechanging method in action. This is the foundation that we use with almost every training dog we work with.
Now go out and practice your driveway drills! This truly is step one. We want your dog to learn how to move with you, and how to respond when she’s tight on the leash (hint: it’s not to pull harder). So spend some time on this step before you progress.
Step 2: Go for a Short Walk
Now that your dog understands basic leash pressure and how to move with you, it’s time to go for a short walk. And we mean short. Like, to your neighbor’s driveway and back, short. The reason for this is simple: you and your dog are relearning how to walk on leash together. So don’t bite off more than you can chew too soon, or you’ll both get frustrated. It’s better to do a short path several times than to end up a mile from home, realize neither of you were ready, and fight the entire way home over what the walk will look like.
You may even set a time limit for yourself – the shorter the better. So today, you may say “I’m going to walk my dog for 5 minutes, and then we’re done.” Tomorrow, perhaps you’ll say “I’m going to walk my dog for 7 minutes, but we’re going to play a game of tug in the middle to have some fun.” Setting short time limits for yourself will ensure that you don’t get burnt out, and that both you and your dog want to come back for more. Additionally, there is a lot of learning that can happen in a short period of time wen you’re focused and engaged. So don’t underestimate the power of a short session together.
Step 3: Test Your Dog’s Attention
So you’re walking to your neighbor’s driveway, but you’re not quite sure if your dog is paying you any attention yet. It’s time to test her attention with this one simple trick: whenever you’re ready, take one big step away from your dog. What does she do?
If she’s like most dogs just learning how to walk on leash, she will most likely not care at all that you’ve changed direction. That’s OK – that just tells us that we need to go back to step one and practice driveway drills for a bit to show her how to follow your movement.
But let’s say she notices that you moved away from her, and she closes that gap so that she’s back by your side again. Congratulations! You have a dog that is focused on your movements and understands that she needs to follow you. Tell her she’s a good girl, give her a treat, and keep moving. And tell yourself “I am learning how to walk my dog.”
Now do it again. And again. And again. Each time, you’re building her muscle memory and showing her exactly what to do when she gets too far away from you: close the gap, little pup.
Here it is in action with our training pup, Gemini. Gemini was 6 months old at the time of his training, and came to us jumping and pulling every time he was on a leash. Look at how following these steps can teach even a young, excitable pup how to follow our movements so that both he and his mom can enjoy their walks. And this only took a couple of weeks!
Step 4: Proof Your Dog’s Attention on Leash
As your dog shows you that she really understands this expectation, you’re going to start going on longer walks, but still throwing this little test in to see if she is paying attention. Try doing it around different distractions, as well, like at a busy intersection, or when passing a dog, or at the playground with kids running around. The more you practice it, the easier it will be for her to keep her attention on you while ignoring the world around you.
Step 5: Go Walk Your Dog!
Now it’s time to tell yourself “I CAN walk my dog. I know I can.” Now that you have this skill and you’ve practiced it in lots of different situations (you’ve proofed it), it’s time to get out and start enjoying walks with your dog. Anytime that you notice she’s struggling or not paying attention, just take a big step away from her. Does she ignore your movement (which tells us she’s distracted and not paying attention like she should), or does she close the gap (she’s focused and moving with you). Either way, you’ll gain valuable insight into where her head is at, and you can help her accordingly.
Conclusion
Walks with your dog should be fun. We want you to have adventures and experiences together. We want you to confidently say “I can walk my dog anywhere!” and actually believe that it will be a fun walk. In order to get to that point, however, you need to put in some work to teach her how to be the best walking companion there is. That means practice. And practice a lot. You’ll be so glad you did.
Let’s talk about those dogs that seem bullet-proof around loud noises and lots of distractions. You know, the dogs that could take a nap in the middle of a thunderstorm or that could walk through a crowded market without flinching at all of the people and food passing by. Those dogs are the envy of every dog owner that struggles with a fearful or nervous dog.
But those dogs didn’t just happen to turn out like that. Yes, genetics can have a huge impact on your dog’s confidence and overall demeanor, so let’s not take that out of the equation entirely. But even the best-bred dog, if left without any training or intentional experiences, would likely struggle if thrown into a crowd of people and noises.
So how do you get your nervous dog to be calm, relaxed, and confident in situations where she currently struggles?
Practice!
As with any new skill, you need to practice. And practice a lot, my friend.
But this doesn’t mean throwing a leash on your dog and dragging her to the farmer’s market every weekend until s he “figures it out”. Please don’t do that – it’ll cause frustration for both you and your dog, and won’t do anything productive for building up trust in your relationship.
No, what we’re talking about is setting up carefully planned situations (aka controlled experiences) for your dog. You want these experiences to test your dog’s comfort level, but in such a way that you know exactly what the outcome will be. And it’s easier than it sounds, so anyone can do it with a little planning.
What is a Controlled Experience
A controlled experience is one where you know exactly what kind of situation you’re about to put your dog into that serves a specific purpose in her training. You will want to plan who or what you’re going to run into, what distractions will be present, and already have a plan for how you will help your dog through those moments. The best part? Your dog has no idea any of this planning is happening, so you’ll be able to see her true response and help her work through any issues that arise.
A few examples might look like this:
Your dog barks and lunges at other dogs on leash, and it’s really embarrassing and frustrating for you. So you ask your neighbor to walk by your house at 2:30 this afternoon when you will also coincidentally be outside with your dog on leash. So at 2:30, you and your dog are enjoying the smells of the yard when your neighbor and their dog stroll by. You knew they were coming, so you’re ready and see them before your dog does. She starts growling and getting ready to lunge, but you’re ready and can give her a quick correction, redirect her attention, and reward her if she makes a better choice.
Your dog is afraid of new people and will bark at anyone that walks up to the house. You see the mailman parking his car and know that he’ll be here in five minutes. That’s just enough time to put your dog on her place bed to relax, all the while knowing that you’re about to help her through a pretty big fear. As soon as she hears the mailman walking up the front steps, your pup starts barking and running to the door. You calmly tell her “no,” walk her back over to her bed, and allow her to calm herself on her bed. Practice this every day, and your nervous dog will soon gain confidence in understanding exactly what should happen when she’s uncomfortable with someone approaching the front door.
In both of these scenarios, you knew exactly what was going to happen, and you were prepared to address your dog’s response calmly. When you aren’t prepared for these encounters, they can feel rally chaotic and overwhelming. But when you know what’s coming, you can act with confidence and provide the best information possible to your dog. And this is how we start turning your nervous dog into a confident one that can handle increasingly stressful situations.
How to Setup Controlled Experiences
So how can you setup a controlled experience for your dog?
First, you need to determine what your dog’s triggers are. What does she struggle with? What makes her really uncomfortable? What gets her so excited that she loses all focus and seems to forget everything you’ve ever taught her?
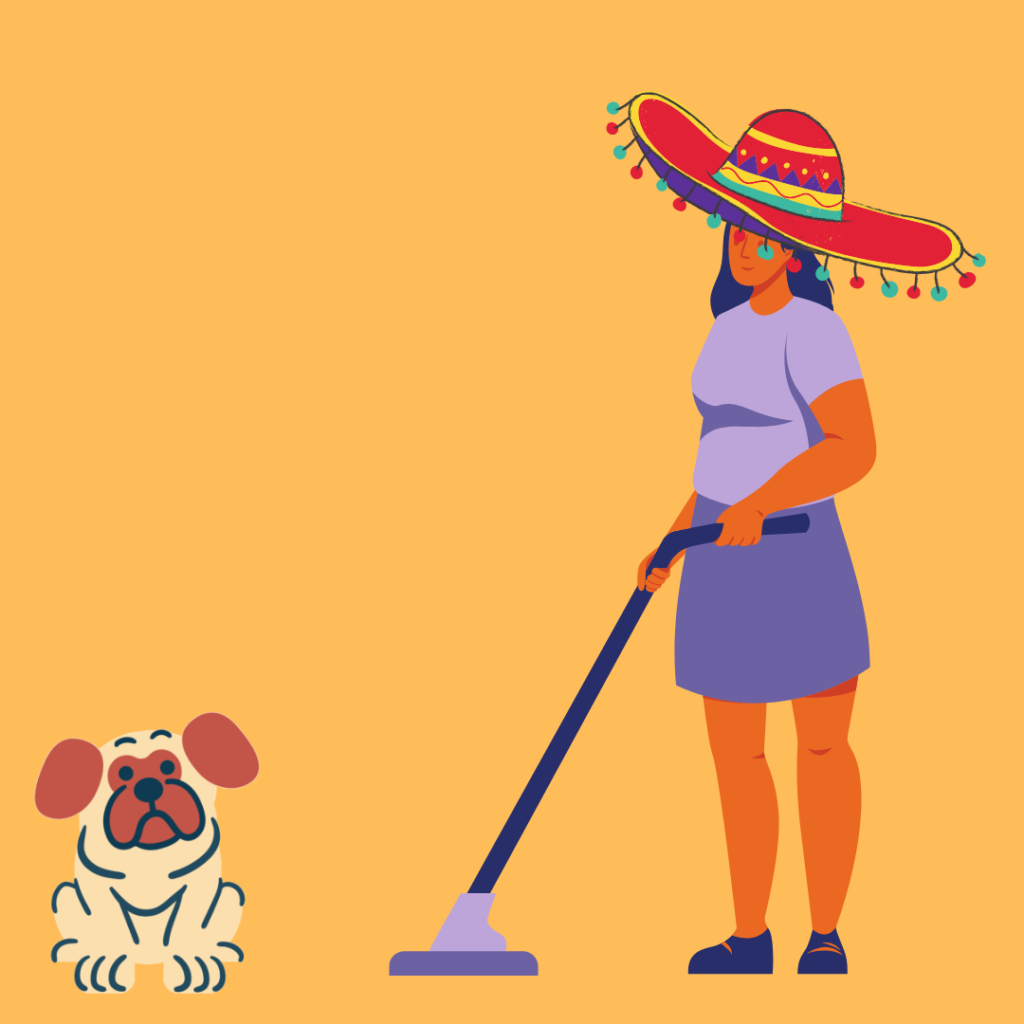
Once you have that figured out, you’ll want to plan a time to expose her to that trigger. Pick one trigger at a time to work on so that you don’t overwhelm her with too much all at once. So if your dog struggles with vacuums, strangers, and people wearing hats, don’t have your co-worker walk in wearing a sombrero while chasing the vacuum around your house. Start small, and just pick one of those things to overcome.
So let’s say you want to work on building your dog’s confidence around the vacuum. One technique is to bring the vacuum out and just set it in the corner of the room while you play with your dog’s favorite toy. The “scary” thing will be there, and she’ll likely side-eye it twenty times during your play session. But she’ll start to see that the monster in the corner isn’t trying to hurt her, and may even forget about it as she plays with you.
The next time, perhaps you’ll try throwing her favorite treats on the floor around the vacuum and allow her to explore as she’s comfortable. The next time? Try turning the vacuum on , but leave it standing still in the corner again so that she can experience the sound without any movement.
And you slowly allow her these positive experiences so that she can see and understand that the vacuum is just a thing that happens sometimes, and she has no reason to fear it. We know it won’t hurt her, but she needs these controlled experiences to learn that for herself.
See it in Practice
In the video below, we have setup a controlled experience for one of our training dogs, Mando. Mando is a very nervous dog around new people. We’re talking so nervous that he would run to the other side of the room to avoid them. So we had our work cut out for us.
Now it’s important to note a couple of things when working through fears with your nervous dog:
Do not force your dog to interact with the thing she’s afraid of. In Mando’s case, we aren’t forcing him to meet anyone. In fact, we’re telling people to ignore him. This will help him feel safe by removing all pressure of a person moving into his space. We simply want him to feel relaxed in the presence of new people.
Keep your dog on leash during these controlled experiences. While you don’t want your dog to interact with the “scary” thing, you also don’t want her to run away and miss the experience altogether (or charge at the thing she’s afraid of, making this an ineffective training opportunity).
No matter what your dog’s response is, stay calm and confident. You prepared beforehand and you have a plan to help her if she struggles, and reward her if she does a great job. Your confidence will rub off on her – if she sees that you’re not worried about the situation, she will be much more likely to feed off of that calm energy. If she sees that you’re nervous or panicking, she will absolutely follow suit.
Conclusion
We know how hard it can be to watch a confident dog stroll around in situations that would put your nervous dog in fight or flight mode. It’s frustrating and overwhelming, and you feel so deeply for your dog and wish you could just give her the magic pill that solves all of her fears. But that pill doesn’t exist.
What does exist is a very clear training plan to start safely exposing your dog to situations that she struggles in. Fear and anxiety take time to overcome. And the best thing you can do for a nervous dog is provide her with safe and controlled experiences where you can show her how to work through her fears.
Are you ready to take that next step for your nervous dog? Does all of this sound great, and you want to help her succeed, but you still aren’t sure where to start? Or perhaps you can see the goal ahead, but want someone to cheer you on and support you on your journey. Reach out to us! We’ll talk through your dog’s behaviors together and help you come up with a plan to build her confidence, set up controlled experiences, and prepare her for all of life’s challenges.
So many owners come to us because they desperately need help teaching their dog to walk calmly on leash (or how to walk in a “heel” command). Perhaps you can relate with some owners that come to us in tears of frustration as they tell us:
“He marks on something every ten feet. We can’t get anywhere on our walks!”
“She lunges and barks at every dog she sees. She sounds so mean.”
“My dog pulled me to the ground chasing a rabbit… and I broke my arm.”
We even had a woman join us for a consultation with a black eye from hanging onto the leash as her dog pulled her through the woods and straight into a tree. It doesn’t have to be this way!
My Dog Already Has a Solid Heel Command
But let’s say you already know that it doesn’t have to be this way. And let’s say you have already worked really hard on your dog’s leash skills and are starting to really enjoy calm walks together.
First of all: congratulations! We know just how hard you must have worked to teach your dog a new way to walk on leash, and you should absolutely celebrate that win. Poor leash skills can create so much tension and frustration between you and your dog, so you should be very proud of your progress.
Second of all, you’re probably asking yourself: “Now that my dog knows how to walk nicely on leash, does she always have to walk in a heel?” The short answer: no. The longer answer: no, but…
So how will you know when it’s time to release your dog from her heel command and let her enjoy some free time?
Take Mental Notes
Here’s the thing: your dog is going to have good days, and she’s going to have bad days. You’re going to have days when you’re really in sync with each other, and you’re going to have days when you feel like you’re not communicating together at all. And that’s OK! It’s part of the process.
We’re going to take all of that information that we gather from every leash walk, and we’re going to start looking for patterns. Ask yourself, “What went well on today’s walk?” or “What about that situation made it feel really sloppy?” or “What happened right before she exploded with barking and pulling at that guy?”
As you gather this really important information, you’re going to start seeing trends. Maybe she loses all focus when she sees another dog. Maybe there is one neighbor that always offers her treats and she will do anything within her power to get to him. Maybe she does really well when your attention is fully on her with treats in hand and earbuds put away. Maybe she is more relaxed when you hold the leash relaxed by your side without tension (hint: this one works!).
Start to take mental notes of these moments. Pay attention when you know that she’s going to need more help, and reward her when she’s doing really well (walking calmly on a loose leash by your side). And when she’s doing really well, one of those rewards can be free time!
Intentional Free Time on Walks
We don’t want to take away the things that your dog enjoys on walks like sniffing, potty breaks, playtime, saying “hello” to a friend. But we do want to be very intentional about when we allow her to enjoy these activities. If your timing is on point, your dog will start to learn that calm behavior earns her more freedom. And she’ll also realize that pulling does not get her the free time that she so desperately would like to enjoy.
So when your dog is calm and relaxed on leash, you’re going to do a couple of things:
First, tell her she’s doing a good job! A simple “Good girl!” can go a long way for a dog that is trying really hard to relax around all of the tempting sights and smells she comes across outside.
Stop walking and ask her for a “sit”. That means butt on the ground, patiently waiting for you to tell her what’s next.
Wait for her to give you eye contact. This one is really important, so don’t miss this step. Where your dog’s attention is tells you a lot about her motives. If she’s staring intensely at a bunny, she’s thinking about chasing that bunny. If she looks at you, she’s thinking, “Hey mom, why are we stopped? What’s next?” And that is a great mindset for a dog to have, because it shows that she’s focused on you and will be much more prepared to listen if you need her to.
After you get eye contact, release her from her sit and allow her to explore. She earned it! Let her sniff, explore, and get all of her cute little wiggles out.
What if My Dog Starts Pulling During Free Time?
Now remember, this free time has been earned by good behavior. And your dog can continue enjoying it as long as she continues to have good manners. This means no jumping, no pulling, no barking, etc. You want to keep your shoulder in its socket!
If she starts getting rowdy and pushy on her leash, we need to change things up for her. You can of course tell her “No,” and if that stops the unwanted behavior, great! But if she chooses to ignore you, it’s time to get her back into that heel command and continue on your walk. This will tell her “I don’t like that behavior. It seems like you aren’t ready for that much freedom and excitement, so I’m going to help you do something that I know you can be successful with (aka walking in a heel command, calmly by my side)”.
This sends a clear message to your dog that her unwanted behaviors have consequences. And losing that time to explore is a pretty big consequence for a dog, so it will hold a lot of meaning for her.
Test and Measure
So giving her too much freedom didn’t work that time… When can we try again?
Anytime you want! But remember, we’re taking mental notes on every walk to figure out what worked and what didn’t. So don’t forget to ask yourself what about the walk, or what about that spot, made it too difficult for her to control her energy?
And now we test and measure. We say, “I’m going to try offering her free time at that tree. Let’s see what she gives me”. If she’s calm, take note. If she’s crazy, take note. And then we try again and we say “I’m going to offer her free time ten minutes into our walk today”. Take note. “I’m going to wait until we get home and then let her play in the yard today.” Take note.
You will start to piece together a puzzle and figure out what works for your dog and what doesn’t. And in the meantime, you’re getting lots of practice with those beautiful new leash skills. So it’s a win-win!
This Seems Like a Lot of Work
That’s because it is! Nobody said that training your dog would be easy. And if they did, they were lying to you. Training a new behavior or a new mindset takes time. Think about the last time you tried to change one of your own behaviors: a new eating habit, a new morning routine, meditating. Did it come easy to you? Did you stick with it flawlessly after the first try? My guess is no, because old habits are hard to break, and new habits take time to form.
So be patient with your dog and with yourself. It is a lot of work, we are in complete agreement with you. But we also know what happens at the other end of this journey when you finally see success. Because we’ve seen it with our clients over and over again.
There’s a huge sense of pride when you figure it out together. You’ll have a stronger relationship with your dog. You’ll become better at communicating with each other. Both your and your dog’s confidence will grow. And you’ll be able to take on new challenges together.
So don’t let the hard work stop you from focusing on your goal of calmer, happier walks with your dog. Walks where you can trust that she won’t react to everything in sight, and where your shoulder doesn’t get a workout from trying to hold her back. And walks where she can happily sniff and explore all the weird smells she comes across.
Where Can I Learn More?
Want to learn more? Check out our video below! We break down a lot of these behaviors and how to know when, how, and where to offer your dog freedom on leash.
Still want to learn more? Reach out toschedule your free consultation. We’ll talk over your training goals and dig deep to find out how your dog walks on leash, what you want life to look like together, and how we can help you get there.
We work with the brand E-Collar Technologies because we believe it to be a safe, effective, valuable tool to help you communicate with your dog. But just like with any tool, there is a learning curve. And that learning curve not only includes the basic mechanics of how and when to use it, but also understanding its basic functions.
In this article, you are going to receive a to break down of the top ten most frequently asked questions we receive about the E-Collar Technologies Mini Educator ET-300. There is a complete video tutorial available for you, or you can jump to the topic that you specifically need help with. Use the table of contents below to navigate through all of the tutorials to get the information that you need.
There’s a lot to learn as you start working with an e-collar. And while there is lots of content out there showing you how to safely introduce your dog to an e-collar and use it in everyday life, this video is all about how to actually get your e-collar working and troubleshooting if something isn’t quite right.
You will learn everything from how to turn it on, what to do if your number gets “stuck,” and when to actually have your dog wear the e-collar. Take some time to really get comfortable with each of these features before you start working with your new tool. This will build up your confidence and make sure you feel comfortable handling it before you even get started with your training. Then bookmark it for later so that you can come back anytime you need a refresher when your remote or e-collar aren’t behaving quite like they should.
How Do I Turn on My E-Collar?
It seems like a simple question, but there is a bit of finesse in turning on your e-collar. Watch the video for a visual tutorial, or follow the break-down below:
Turning Your Remote On and Off
To turn on the remote, flip the remote over to the back. There is a large black button in the middle with an “L” on it, with the words “On/Off/Light” to the left.
Hold down that button for about three seconds.
The display screen on the front of the remote will flash “On” briefly, and then your display light will turn on.
Your remote is now ready for use!
To turn the remote off, hold the “On/Off/Light” button down for about three seconds.
The display screen will briefly flash “Of” for off, and your display will go blank. Your remote is now off.
Turning Your E-Collar On and Off
When you look at the side of your remote, there is a little red dot about two inches down from the antenna. You will find a matching red dot on the side of your collar next to the LED light.
Tap the red dot on your remote to the red dot on your collar briefly, for about one second.
A green light will begin flashing on your collar. You are now ready to start using it!
To turn the collar off, tap those two red dots together briefly again, for about one second.
The light on the e-collar will flash red, and then there will be no lights. Your collar is now off until the next time you’re ready to use it.
What Do the Flashing Lights Mean?
Have you ever wondered why your e-collar and remote keep flashing lights at you? Nothing is wrong (usually). It’s just the system’s way of letting you know that it’s working, communicating, or that you might need to charge it. Let’s break down the colors for you:
Flashing Green, Orange, and Red Lights
Green flashing light on remote or e-collar: your device has a full charge. The light on the remote will only flash while the display is on. This conserves battery power. The light on the collar will flash continuously while your system is on.
Orange flashing light on remote or e-collar: your device’s battery is running low, and you likely only have a few hours of life left in it. Best to charge it soon so that you don’t have a dead battery.
Red flashing light on remote or e-collar: your device’s battery is about to die (give it ten minutes tops).
Solid Red Lights
When you tap or hold a button on your remote, you’ll notice that the light on the remote and the light on the e-collar both turn red and stay red until you release the button. This simply lets you know that they are communicating with each other, and that the e-collar is receiving a message from the remote.
If you tap a button and the e-collar light does not turn red, they are not communicating properly. This could mean that your e-collar is off and simply needs to be turned on again, that your battery is dead, or that something has changed with your settings preventing clear communication. If you know that you have a full charge but they aren’t communicating, pull out your owner’s manual, or download one from E-Collar Technologies’ website here.
When Should I Charge My E-Collar?
Check out the section above titled “What Do the Flashing Lights Mean?” to see when it’s time to charge your e-collar and remote. The lights will let you know when your battery is running low.
We recommend charging your e-collar anytime the lights start flashing orange. To do this, you simply flip up the dust cover on the back of the remote, and the underside of the e-collar, and plug in the charger that was included in your box. You can expect it to take a couple hours for your system to go from completely dead to fully charged.
When on the charger, your system lights will be a solid red, letting you know that they are charging. They will turn green when they are fully charged and ready to be used again.
We also love reminding people that E-Collar Technologies has a car charger. You don’t want to get to your favorite hiking spot only to realize you have a dead collar -so charge your system on the road so you have it ready when you get there. You can snag yours here.
What Does the Display Mean for My E-Collar?
If you’re not familiar with your new e-collar, the display can look like a bunch of jibberish. But getting comfortable with the different symbols can really help build your confidence and understanding of the tool.
The number in the middle of the screen: This is the stimulus level that your dog will feel when you tap the stimulus button (the black S button on the side). This number can be adjusted by moving the dial up or down.
“1D” flashing on top of the screen: This means that you have one dog collar paired with your remote. You can set up your system to communicate with two dog collars, and then there would be a flashing “1D” on top of the screen (first dog) and a flashing “2D” on the bottom (second dog). The default and most common is for your remote to be paired to only one collar.
“C” on the right of the screen: If you receive your e-collar through us, we will program your settings so that your remote will be in “Continuous Mode”. This is what the “C” represents. Continuous mode allows you to tap a button, or to hold it continuously. While your finger is on the button, your dog will receive a continuous stimulus. Once you release the button, your dog will no longer feel the stimulus.
How Do I Turn on My Collar’s LED Light?
We love the LED light feature! Not only can you see your dog during late-night potty runs, but you can feel safer knowing that people and cars can see your dog on evening walks. So make sure you know how to use this incredibly useful safety feature.
To turn on your LED light, you need to flip your remote over to the back and locate the big black button in the middle with an “L” on it, labelled “On/Off/Light”. Tap this button very briefly. The light on your e-collar should now flash a bright white light every few seconds. If you prefer a solid light, simply tap that “On/Off/Light” button again, and the light will turn solid. Tap the button a third time and your light will turn off.
How Do I Switch Between Tone and Vibrate Modes?
Your e-collar system offers some variety in how you can use the “T” button on the side of the remote next to the antenna: tone or vibrate. So figure out which you prefer, or learn how to switch between settings quickly to use whichever feature you need in the moment!
The “T” button can either provide a tone (a high-pitched beep that comes from the collar), or it can make the collar vibrate. If you train with us, your system will be setup with the tone feature, because we use this for recall with your dog (when your dog hears the beep, she will learn to come find you). So tap that button, and your collar will beep. But let’s say you want to try the vibrate feature.
To change modes, you need to first turn your stimulus level all the way down to zero (0). Turn the knob until the number on the display says (0). Next, you will need to tap the “On/Off/Light” button on the back of the remote, followed immediately by pressing the “T” button on the side of the remote. Your remote will beep once and then quickly flash an “A” on the screen. Now if you tap the “T” button, your collar will vibrate.
To switch back to the tone feature, you follow the same process: turn the display to (0), tap the “On/Off/Light” button, and then the “T” button. The remote will beep twice, quickly flash a “T” on the screen, and you will now be able to use the tone feature again.
*Please note that the vibrate feature is actually very startling for many dogs, and we don’t recommend using this feature unless you properly teach your dog what the sensation means and how to respond to it.
Help! My E-Collar Level is Locked!
Have you ever tried to change the number on your remote’s screen, only to have absolutely nothing happen? You’re not alone, and people usually think their system is broken when this happens. But it’s actually a really nice safety feature (assuming you know what’s going on).
Locking the stimulus level on your dog’s system ensures that you don’t accidentally go too high unnecessarily. We especially like to use this feature when remotes are hidden in our pockets during cold winter walks -we don’t want to accidentally bump the dial and go too high or too low. So that’s when we use this feature!
To lock your remote’s level, simply press down on the dial for about one second. The number on your screen will flash briefly, and now your level is locked! No matter how much you turn your dial now, the number will not change.
To unlock your number, follow the same process: press down on the dial for about one second until the number on the screen flashes. You can now change the level as necessary.
What Do All of the Buttons Do?
This is probably the most important question you should be asking when you start working with your new e-collar system. You want to become a pro at using all of its features, and that means getting very comfortable with each of its buttons and knowing exactly how they work. So let’s review what each button does.
Black “S” Button
This will be your most commonly used button on your remote. This button provides a stimulus to the collar at the level in the middle of the remote’s screen. You can change the stimulus level by rotating the dial on top of the remote. So anytime you need to provide information to your dog using your e-collar system, this should be your go-to option.
Red “S” Button
The red S button provides a boost to the stimulus level present on the screen. Your system is setup by default to add 5 to the level on the screen. So if your level is currently set to 10, tapping the red button would increase the level to 15. This is useful when needing to give your dog a little more information, but a jump of 5 can be too high for some dogs, so you can change the stimulus level to be any range of numbers from +1 to +30.
Black “T” Button
The black T button can switch between providing a beeping tone or a vibrate to your dog’s collar. Please see the section above titled “How Do I Switch Between Tone and Vibrate Modes?” if you would prefer using one feature over the other.
“On/Off/Light” Button
This button is on the back of your remote and allows you to turn your system on and off by holding it down for about three seconds. If you tap the button briefly, it will turn on your e-collar’s LED light (which is really useful for seeing your dog at night).
“M/C” Button
This is the small black button on the back of your remote labelled “M/C”, and it allows you to adjust your programmable settings between momentary and continuous. Depending on which setting you prefer, the functions of your buttons will change slightly. For our training purposes, your system will be setup to Continuous Mode, and you will see a corresponding “C” on the right of your screen representing this.
Can My Dog Wear the E-Collar in the Water?
Short answer: yes! Both your remote and your e-collar are waterproof and can join you on your swimming adventures (or when you get stuck in the rain). The remote can also float, so there’s no worry about accidentally dropping it on your next kayaking adventure.
The important thing to note here is that you need to take the collar off your dog after swimming so that the fur and skin can fully dry underneath. Allowing anything to sit wet for too long is going to cause discomfort -just think about how quickly you want to get out of your wet swimsuit into some dry, comfy clothes. Leaving the collar on wet skin too long can cause skin irritation, so make sure your pup is comfortable and wait until her skin is fully dry before you put her collar on again.
How Long Should My Dog Wear the E-Collar?
This is a great question, but unfortunately the answer is: it depends on your dog.
When you and your dog are first learning about the e-collar (what it means, when to use it, how to respond to it), she should really only be wearing it when you’re actively working with her. You can have her wear it at other times to just get comfortable and familiar with it, but you won’t be using it very often at first.
Once your dog understands the e-collar and you’ve gone through extensive training in teaching her all about it, then you can, and should, have her wear it pretty much anytime she’s out of the crate.
Think of it like a dog leash. Your dog wears her leash every time you go for a walk together. It’s second nature at this point. But she’s (hopefully) not pulling on it the entire time; it’s just a safety measure to make sure that IF you need it, you have it available. But the goal isn’t to rely on your leash to keep your dog from running away.
The e-collar should become the same thing. Your dog will wear it all the time, but you shouldn’t be dependent on it. It should be a back-up for moments where she’s struggling to listen, is over-stimulated, or needs an extra reminder.
But here’s the catch: you never know when those moments are going to come. So you always want to be prepared, should the need arise. You don’t want to try putting a leash on your dog after she’s run away, and in the same way, you don’t want to try to put your collar on your dog after you need to communicate with her.
So keep that collar on. If you are still relying on it pretty heavily, that means you’re still in training mode, and there is absolutely nothing wrong with that. But as you and your dog become more proficient with the system, it will become a back-up tool for those moments when you do really need it.
Conclusion
And that’s it! That’s everything you could possibly want to know about how the e-collar works. Well, not entirely. But those are the most frequently asked questions that we wanted to cover for you. If you want to see someone actually working with an e-collar on a dog, we recommend checking out the following videos. These videos are meant to teach and demonstrate the safe use of this tool, and to demonstrate how incredibly useful it can be in everyday life:
As always, please reach out to a trainer if you’re interested in training your dog on an e-collar. While it is a fantastic training tool, it does take time, experience, and practice to get really comfortable at using it. So if you’re going to invest time and energy into your dog’s training, please make sure you have the help you need to be successful long-term.
The more traveling we do, the more we realize how fortunate we are to have so many wonderful city, county, and state parks so close to home. And you don’t have to travel far from home to feel the beauty and peace that comes with a wonderful and relaxing nature walk.
So if you’re looking for a new adventure to enjoy with your dog, we highly recommend these state parks. They’re closer than you might think!
If you’re going to be spending all day out with your dog, remember to follow proper dog etiquette so that everyone (those crazy non-dog lovers included) can enjoy their day. Check out our blog post on the best ways to make sure you’re keeping dog-friendly spaces happy and safe for everyone.
Everyone wants to give their dog off-leash freedom. It’s so fun watching them frolic and play, ears flapping in the wind. But when it’s time for fun to end, many dogs seem to “forget” their name.
So what’s the secret for a reliable recall? A leash.
Stop giving your dog freedom off-leash until you know she’ll come on leash. It’s that easy! Now go practice!
*Obviously there’s a whole lot more work that needs to go into your dog’s training than just keeping them on leash. But a leash is the best way to ensure you don’t lose your dog, and that she’ll come back when you need her to (Because she’s attached to you. There aren’t a whole lot of options for running away when you’re physically connected). If you truly want to work on your off-leash freedom, give us a call. We work on this every day and are ready to help you, too!